
Planting a
Tree
Container — Bareroot
Thank you for choosing to plant a tree during the most environmentally critical time on Earth.
If planted and cared for correctly the tree will live to maturity and support you and the ecosystem around you. Planting trees isn’t complicated, but being patient & attentive on planting them correctly matters in ensuring their longivity.

Let’s get started by understanding the type of root stock you have received:
The tree(s) you have been given are of containter stock variety that have been planted into pots using native soil – no potting soil has been used. Bare root trees are typically grown in the ground until they’ve matured for about 1 year or more. They are then cut out of the ground with a spade and growers remove all the soil on the roots and dip them into a substance called hydrogel to maintain moisture on the roots. This is done because it is much easier to transport and plant these kinds of root stock. Please get them in the ground as soon as possible. No fancy equipment or soil amendments needed, just your hands and maybe some simple hand tools such as a garden trowel or shovel.
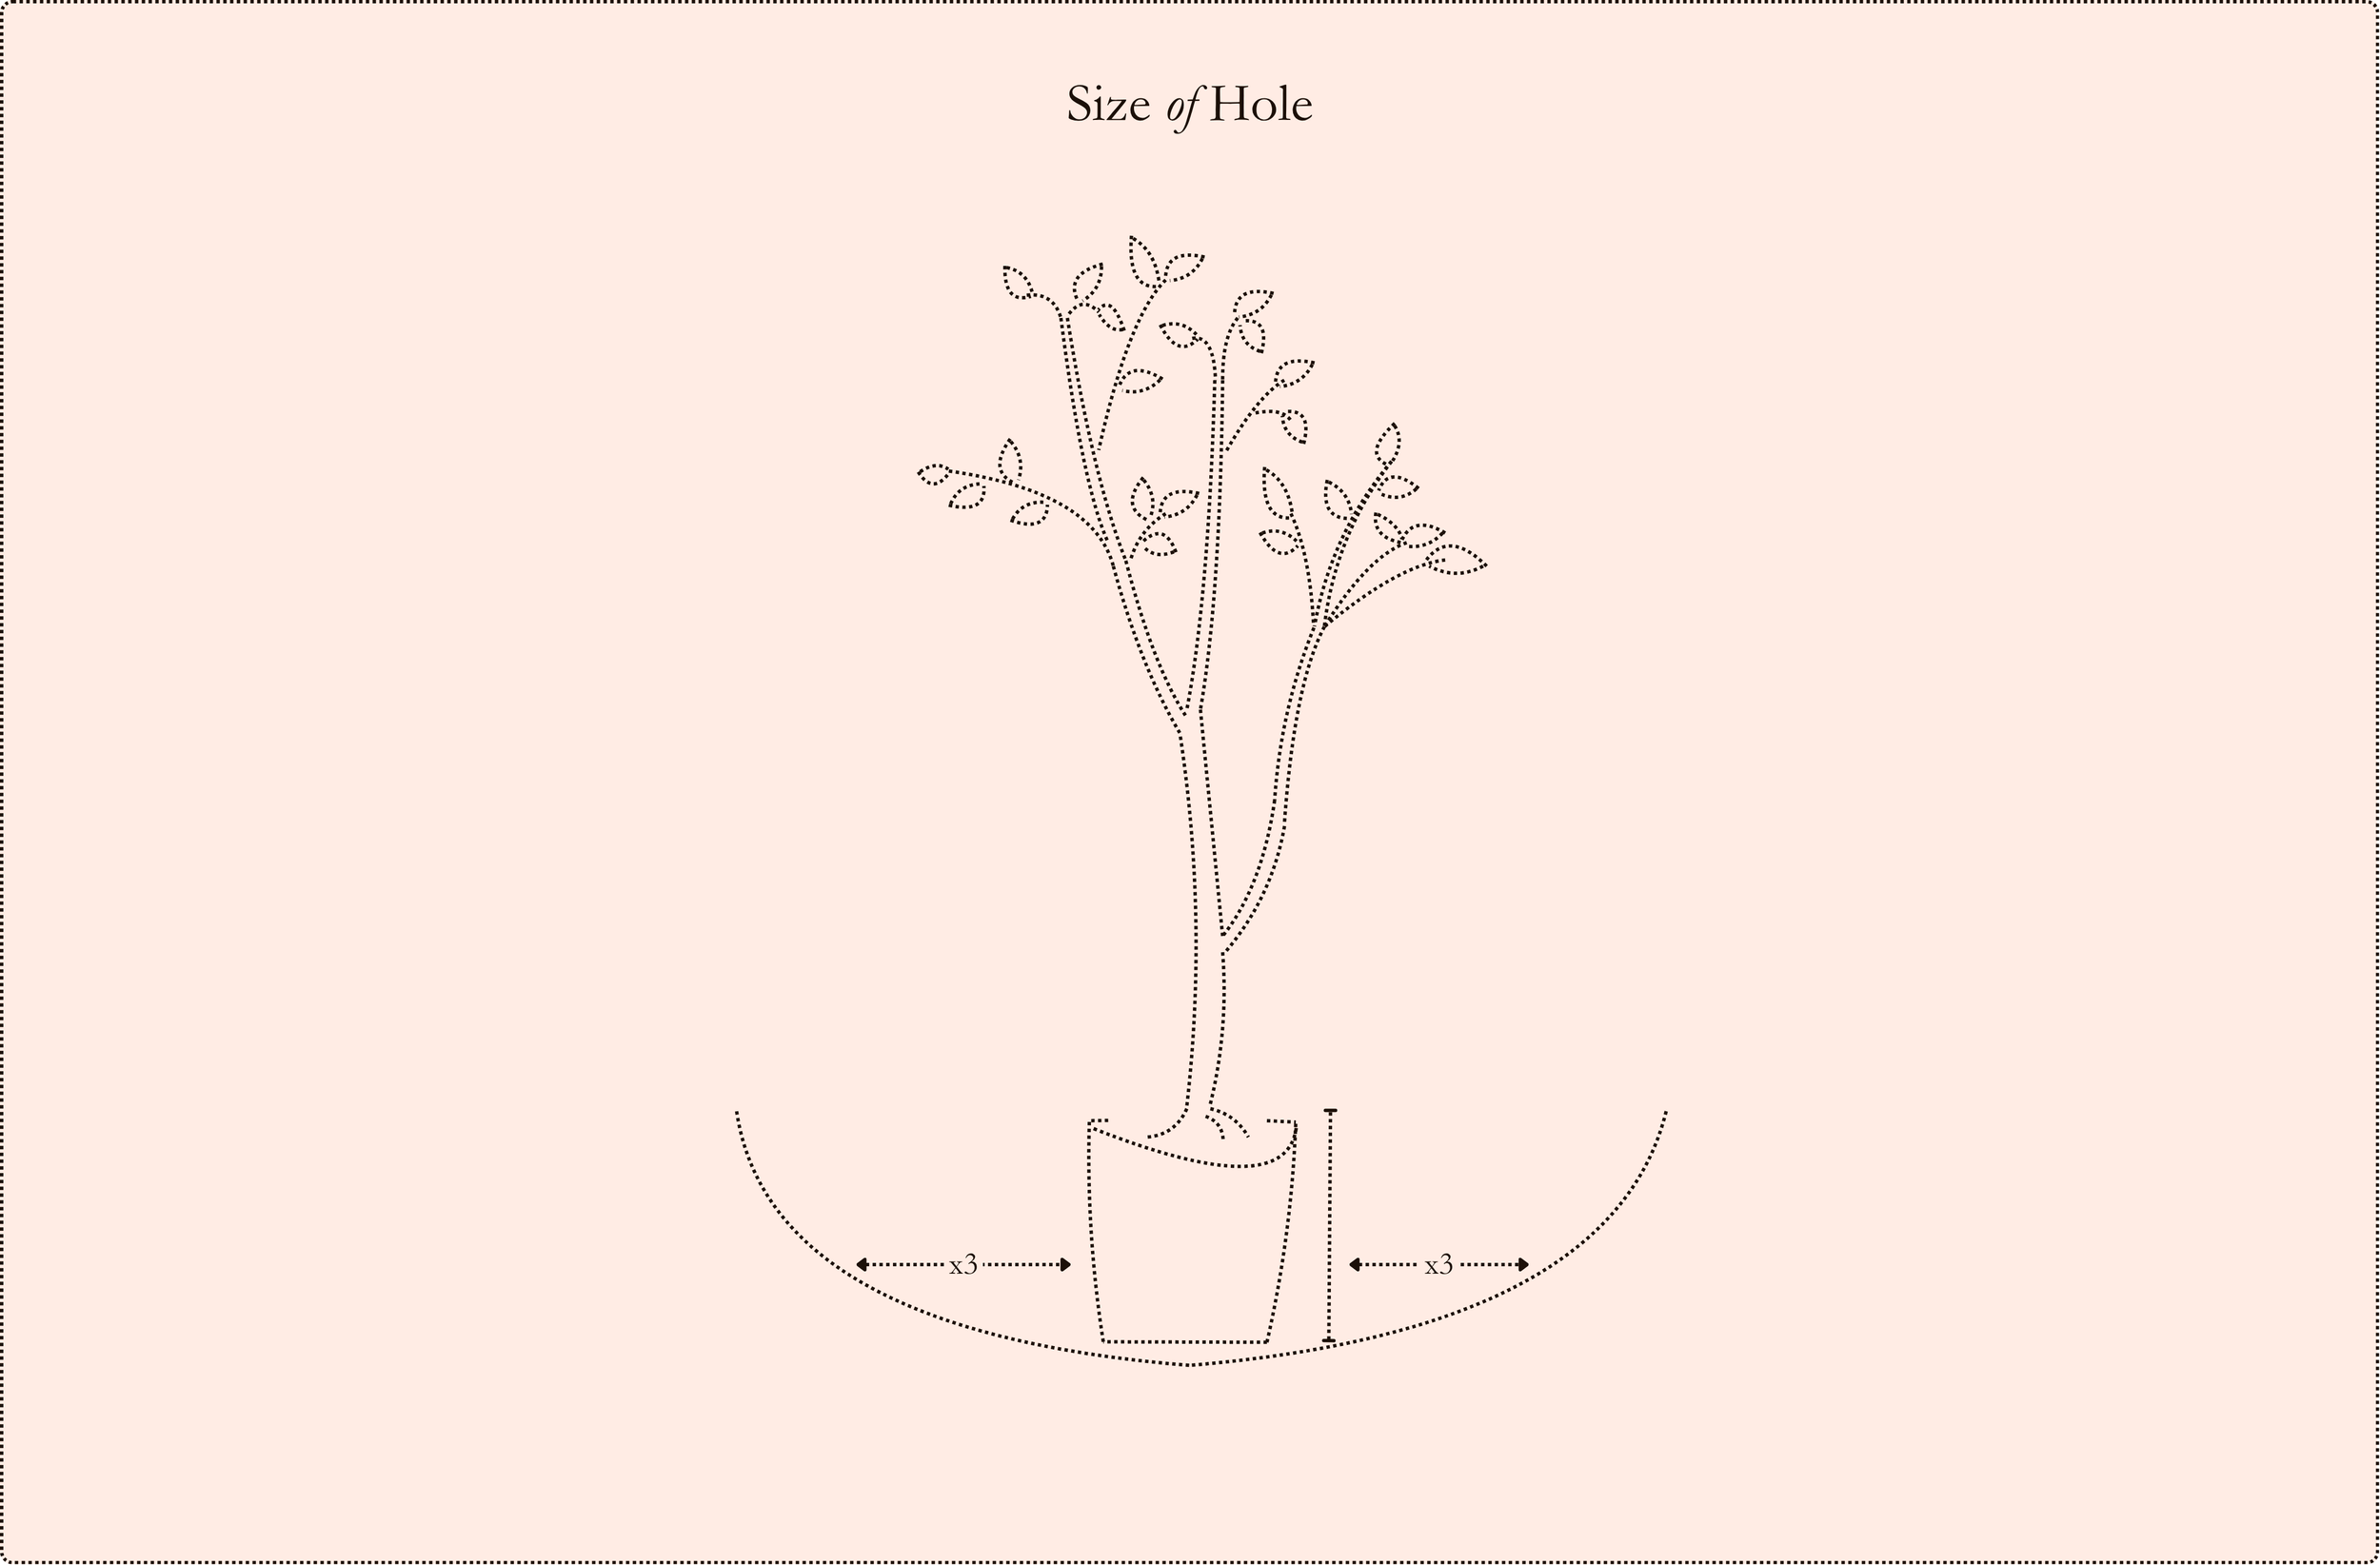

1. Start by digging a hole that is as deep & 2-3 times the width as the container the tree is in. Take care to not bury the tree in the soil, ensure that the root flare is at level with the ground once the tree is inside the hole you just dug. The root flare can be described as the location on the tree where the main trunk or stem meets those structural roots. On these bare root trees it may be a bit more difficult to differentiate but the concept is the same.
2. Once you have successfully dug a hole that is deep & wide enough, carefully remove the tree from its pot and massage the roots before placing the tree inside the hole. Once in-ground, start layering soil and small amounts of water. This ensures the root-flare isn’t buried, and that the roots get enough water during planting, this is crucial as roots can only access the nutrients in the soil if they get enough water.
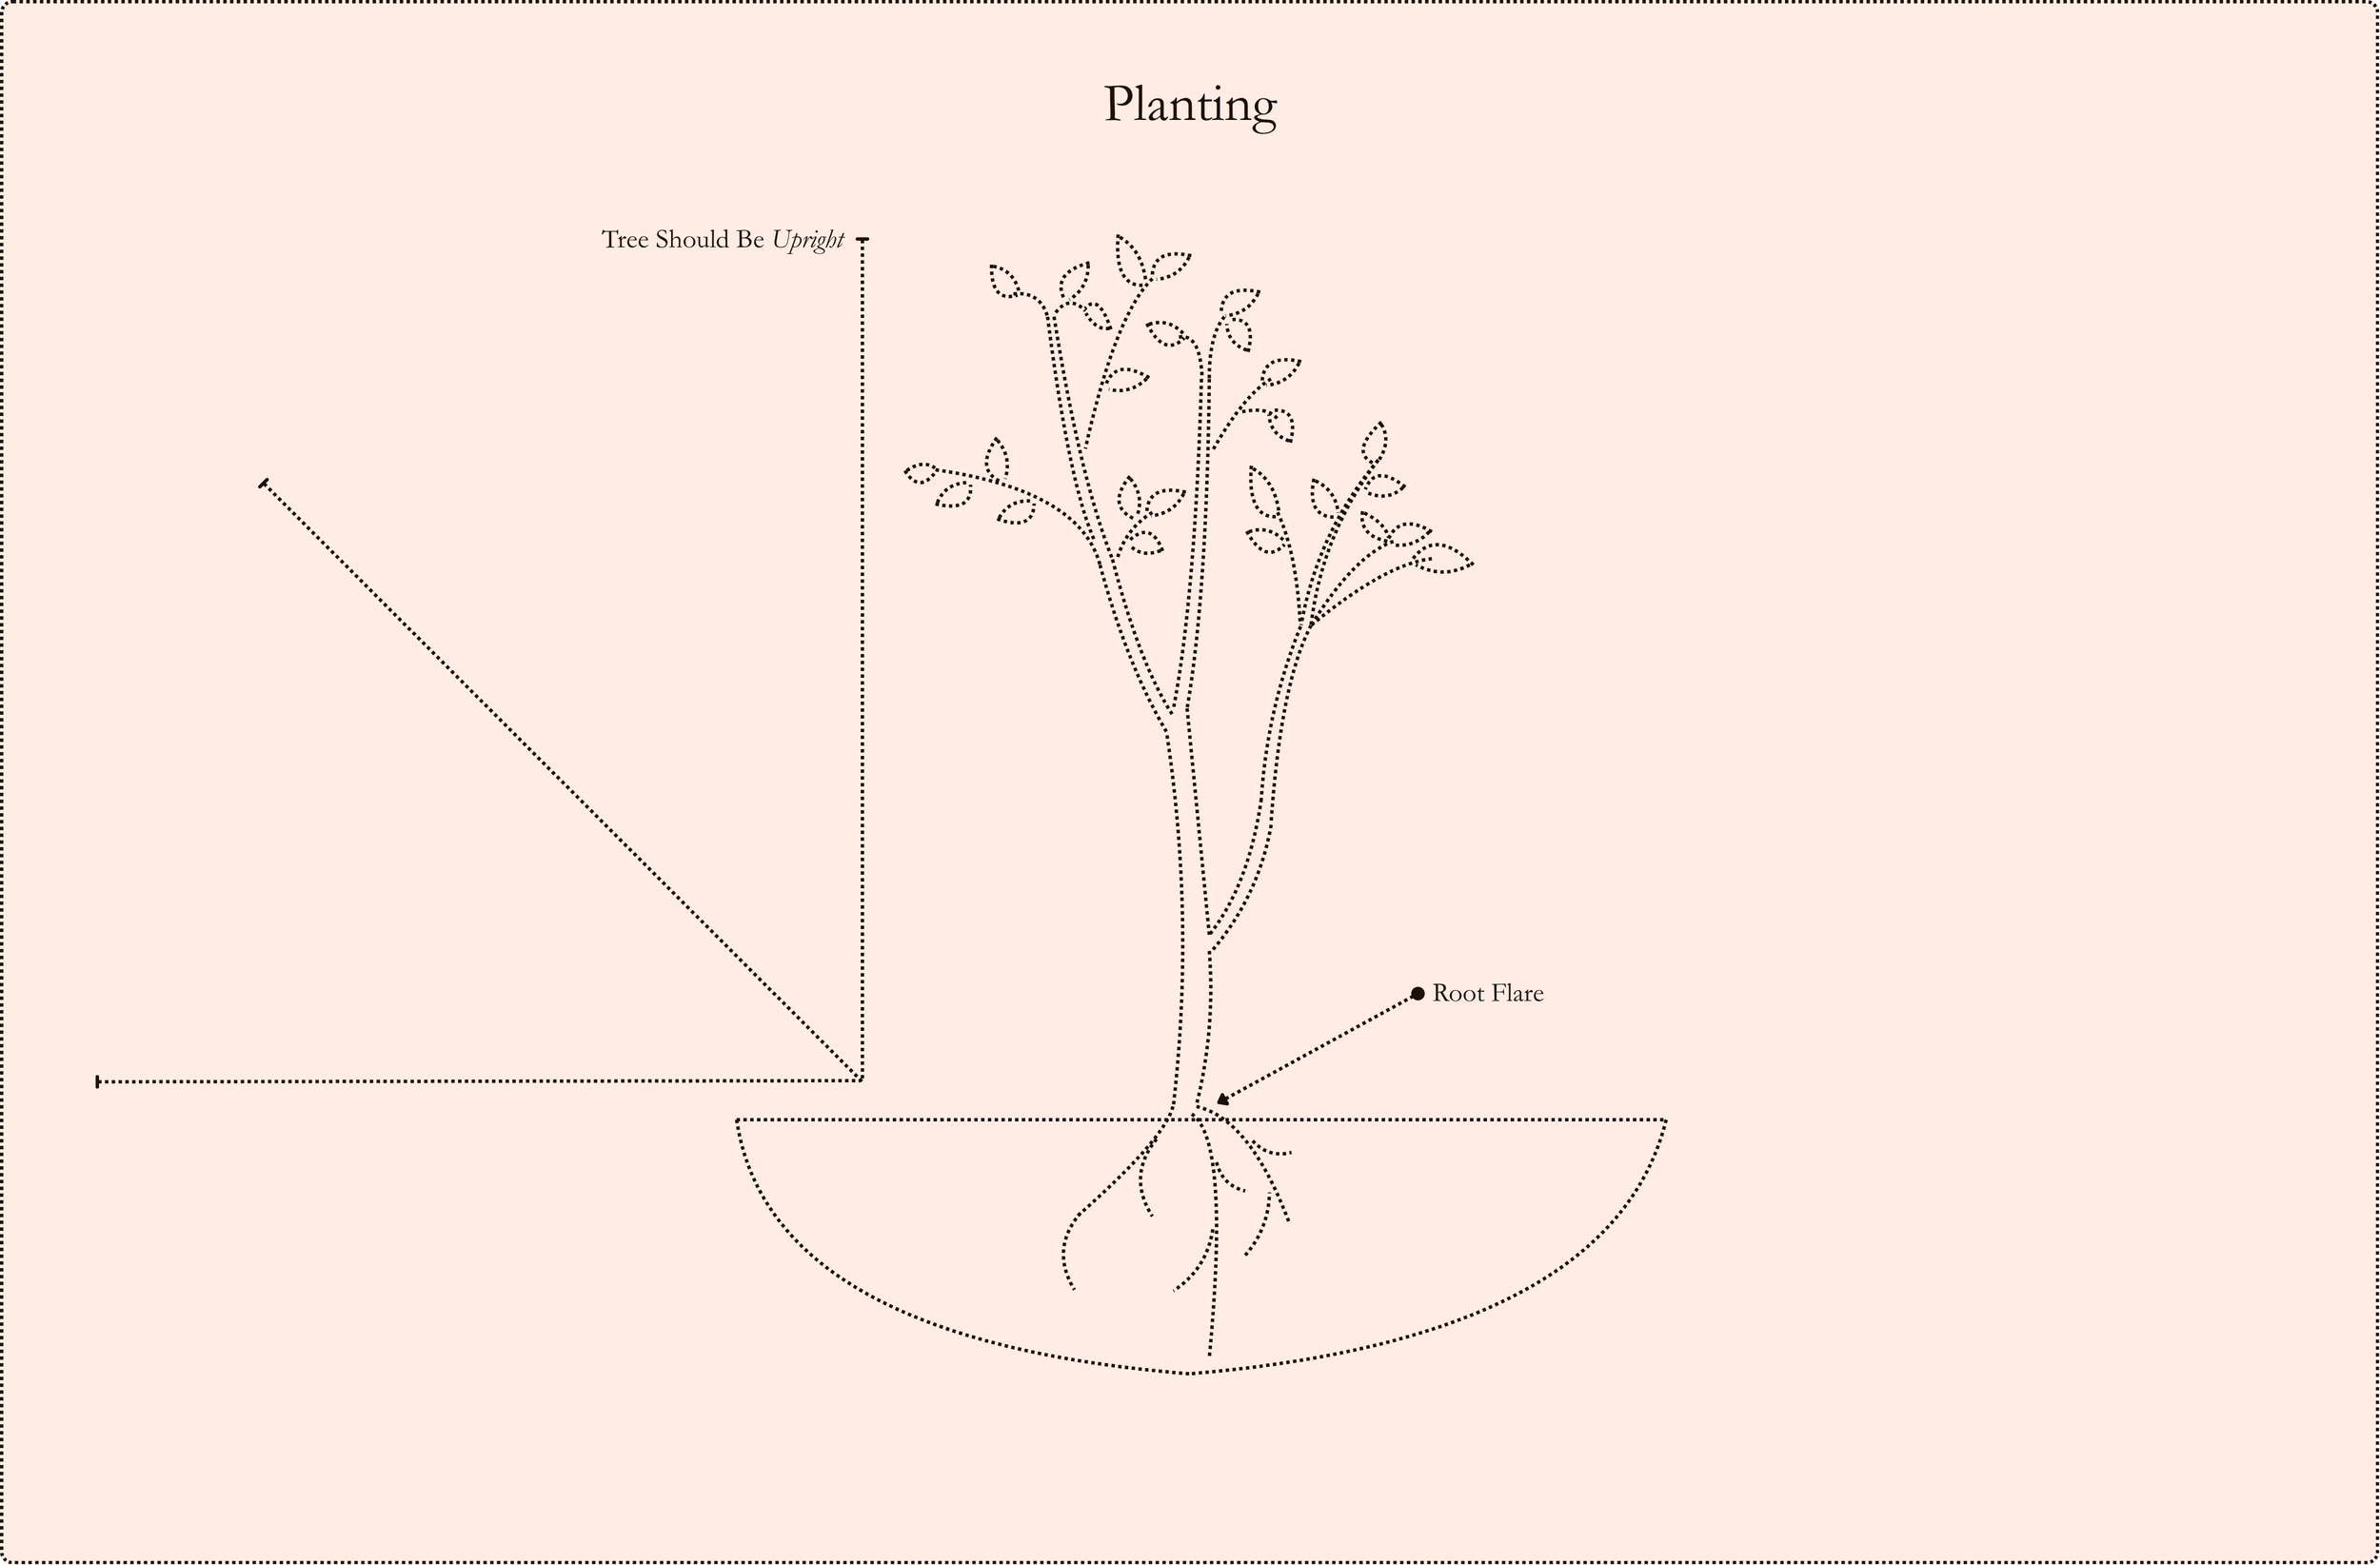
3. After layering soil and water up to the root flare of the tree make sure the tree is standing up right. A tree that is leaning may have structural issues later in life, we want to make sure our trees are standing upright in their new homes to establish a strong root system in the soil.

4. Now that planting is done, build a berm of mulch or straw around the tree that is at least 6-8 inches wide in diameter and 1 or 2 inches deep. When we build this berm we want to make sure it resembles a donut not a volcano. One of the most common mistakes when caring for trees is piling mulch on the trunk. This causes moisture to build up against the trunk of the tree and eventually causes fungal and rot issues. It is best to use the donut method with mulch.
5. Mulch provides a variety of benefits. It holds moisture for the tree during hot days, suppresses weeds and provides organic matter that the tree can later feed on as the mulch breaks down. We prefer to use straw mulch or arborist woodchips.
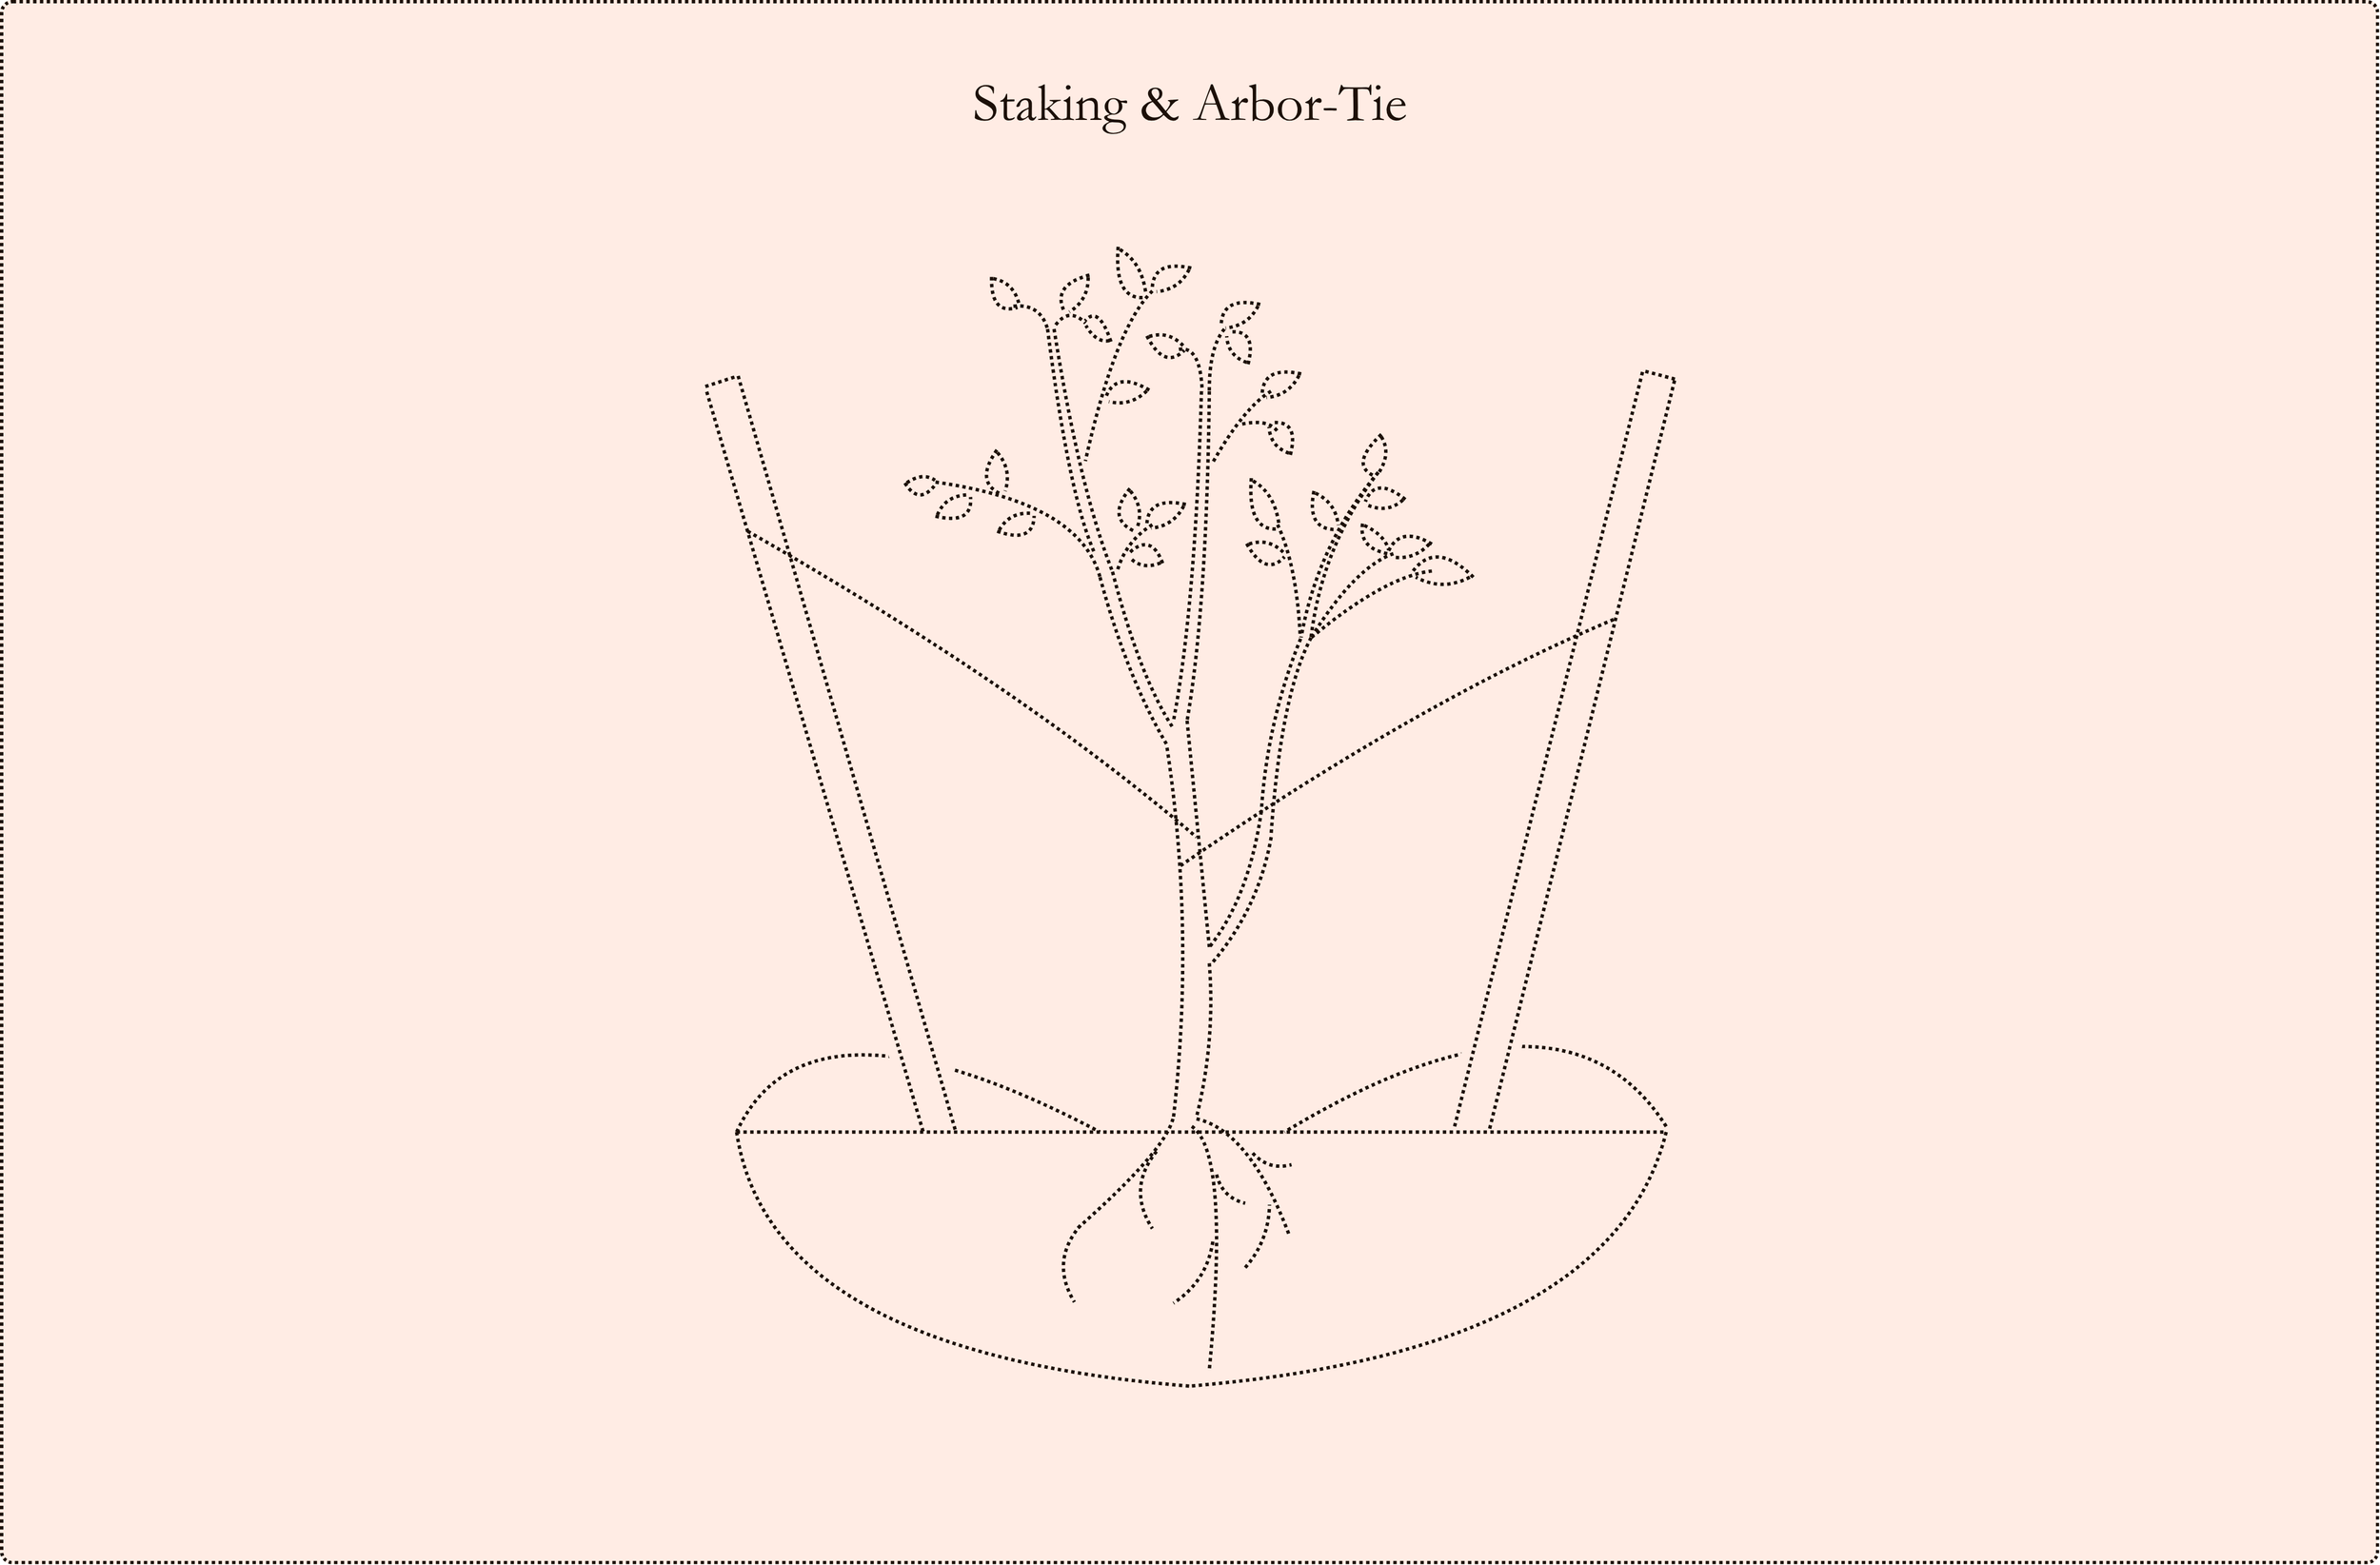
6. If the tree is of significant height, for example: 5 feet or above, staking & tying the tree should be considered to prevent harsh winds from uprooting the tree. It may take upwards to 2 years before the roots finally establishes and stablizes the tree, by which time, stakes & ties should be removed.
7. Finally, rabbits or deers if they are present in your area, often rabbits, or deers, will eat the buds, or the bark of young trees during the months where food resources are low. Chicken-wires, or trunk-guards are great options to considered if you want to protect the tree from being eaten.
And That’s it! Congratulations on learning how to successfully plant a tree! We hope the tree grows and matures wonderfully, and graciously!